
Proxmox VHDX import. Convert a physical Windows PC to a VM by creating a VHDX image
I recently had to set up a Proxmox Hypervisor and convert a physical Windows 10 machine into a virtual machine running on this server. It’s not a very complicated process, but since it was my first time doing this on Proxmox, there were a few steps I didn’t know beforehand and I wanted to document the process.
Create the Windows VHDX Image
This guide won’t go over the whole process to create the VHDX file, but you can do this by downloading Disk2VHD, and running it on the machine you want to migrate. Keep in mind that the file will be quite large (depending on your disk size), so make sure you have enough space for it.
Transfer the VHDX to Your Proxmox Host
We have to move the VHDX file to the Proxmox server to we can import it. There are a few ways you can do this.
Option 1: Copy the VHDX via SFTP (WinSCP)
You can download and install WinSCP on the same Windows machine, and copy the VHDX file to Proxmox through SFTP.
Option 2: Use a USB Drive to Move the VHDX
You can copy the VHDX file to a USB drive, then connect it to the Proxmox server and mount to access the files.
First, make sure that the USB is connected correctly. The following command will show a list of all block devices connected to your system. Search for a device that matches the size and/or label of your USB drive. It might appear as /dev/sdb, /dev/sdc, or similar.
lsblk
Create the folder where you’ll mount the USB drive. You can choose any location and name, but /mnt is a common place for this.
mkdir /mnt/usb
Mount the USB drive to make it accessible within the file system. Mount it to the mount point you created.
mount /dev/sdb1 /mnt/usb
Replace sdb1 with the device name you identified earlier. Make sure you specify the partition (e.g sdb1) and not the device (eg sdb). If the USB drive is formatted with NTFS you need to specify this, and it might require installing the ntfs-3g package:
apt update
apt install ntfs-3g
mount -t ntfs-3g /dev/sdb1 /mnt/usb
Once mounted, you can check the contents of the mount point with ls -l /mnt/usb and the mounted filesystem and disk usage with df -h /mnt/usb.
Create the New Proxmox Windows VM
Create a new VM in Proxmox. There are a few settings we need to set.
- On the OS tab:
- Don’t use any installation media.
- For Type, select Microsoft Windows.
- For Version, select the version that matches the VHDX.
- Select Add additional drive for VirtIO Drivers.
- Select the ISO image for your VirtIO drivers.
- On the System tab:
- For Machine, select q35.
- For SCSI Controller, select VirtIO SCSI.
- Select QEMU Agent.
- For BIOS, select OVMF (UEFI).
- Select Add EFI Disk.
- For EFI Storage, select your storage location.
- ⚠️ If you are converting a Windows 10/11 machine, select Add TPM, set the TPM Storage volume, and for Version, select v2.0.
- On the Disks tab, remove the default disks.
- Set the CPU and memory as you see fit.
- On the Network tab, for Model, select VirtIO.
- Finish creating the VM. ⚠️ Uncheck “Start after created”.
- ⚠️ Note the VM ID for later use.
Add the Converted Disk to the VM
Import the VHDX into Proxmox Storage
Open the shell on the Proxmox node and run the following command:
qm importdisk [vm_id] [vhdx_file] [storage]
- Replace
[vm_id]with the ID of the VM you created. - Replace
[vhdx_file]with the path and filename for the VHDX file, either on the USB drive or the path you copied it to using SFTP. - Replace
[storage]with your storage name.
Example:
qm importdisk 200 /mnt/usb/WIN10.vhdx local_lvm
This process might take a while, depending on the size of the disk.
Attach the imported disk and boot from it
We will do a few changes to the VM’s settings. On the Hardware tab:
- Look for the imported disk, usually shown as Unused Disk 0, double click on it and set the Bus/Device to SATA.
- Add a new 1GB VirtIO Block disk. This is just temporary to force Windows to load the VirtIO drivers.
On the Options tab:
- Select Boot Order and set the SATA disk as the first device and make sure Enabled is checked.
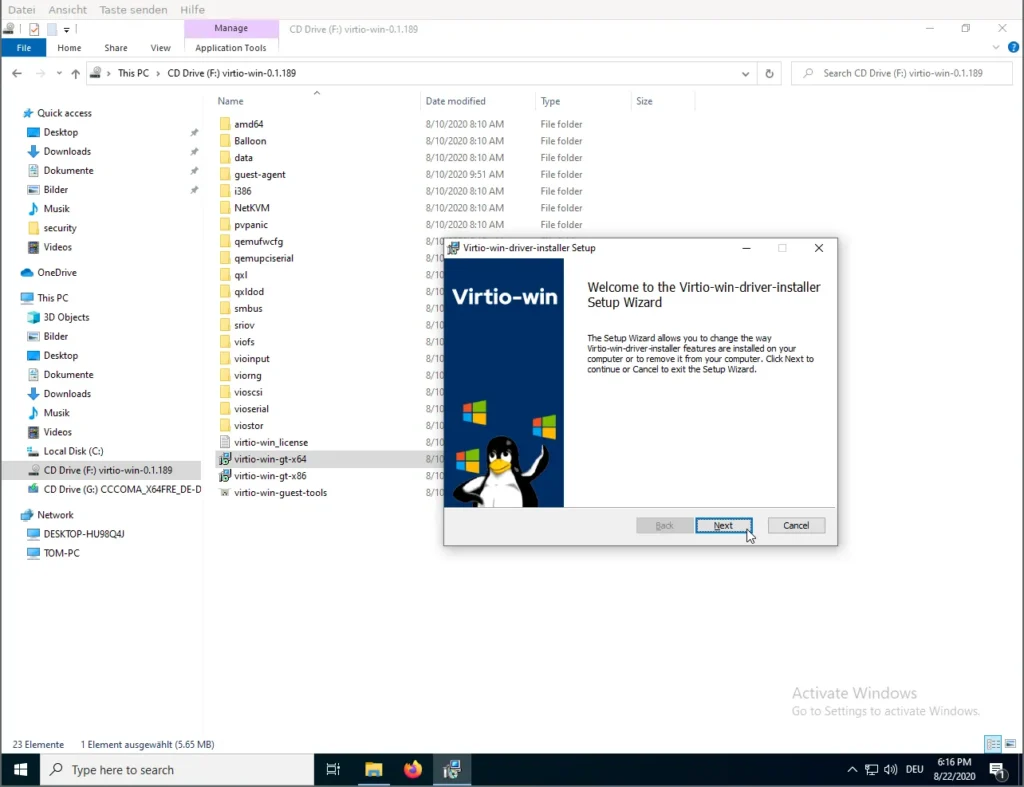
Start the Virtual Machine, and open the Console. Let Windows boot and once inside the VM, install the VirtIO disk drivers. Once installed, open Disk Management and verify the VirtIO disk appears correctly. You may also need to install VirtIO network drivers so the VM’s network adapter works correctly.
If everything is fine, shutdown the VM.
Now we will edit the VM’s settings again. On the Hardware tab:
- Detach both the 1GB VirtIO disk and the main disk you imported. Select each disk, and click Detach > Yes.
- Re-attach the main disk, but this time as a VirtIO Block disk.
- Remove the 1GB VirtIO disk.
On the Options tab:
- Update the Boot Order to use the VirtIO disk.
Start the Virtual Machine and open the Console. Windows should boot up fine and the VM should run natively in Proxmox and with better performance than with the default SATA configuration.